Soap Making 1 2 3
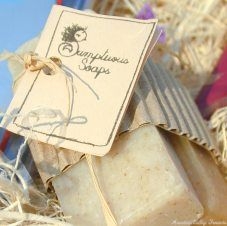
Few things are as simple and yet luxurious as a bar of homemade soap. These instructions should help you make your own sudsy little bit of heaven.
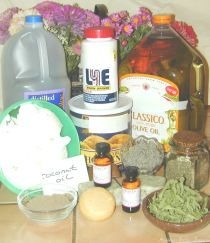
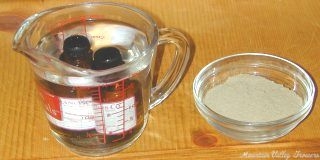
This recipe is for Comfrey Lavender Soap, but only the imagination defines the limits of soap making. The ingredients from left to right are:
- 32 Ounces Distilled Water
- 12 Ounces Sodium Hydroxide or LYE
- 24 Ounces Coconut Oil
- 24 Ounces Olive Oil
- 38 Ounces Vegetable Shortening
- 2 Tablespoons Dried Comfrey Powder
- 1-2 Ounces of Lavender Essential Oil
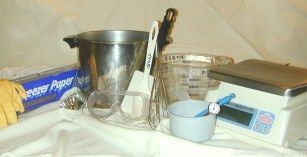
The supplies, from left to right, include:
- Rubber Gloves
- Goggles
- A scale that measures ounces up to 3 pounds
- A thermometer
- At least a 1 gallon Stainless Steel Stock Pot
- A Rubber Spatula, A Slotted Plastic Spoon and a Wire Whisk
- 4 Cup Glass Measuring Pitcher and a 2 Cup Glass Bowl
- 8 Cup heat proof measuring cup
- Freezer Paper
The utensils used for soap making should NOT be used for anything else. Aluminum should never be used with Lye.
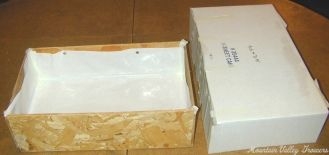
The last tool needed is a form to put the hot soap in. Here we have used a homemade box with a recycled cake box for a lid.
It is hard to believe these humble supplies can become this incredibly fragrant slab of soap!
Step One: Preparing the mold
Our mold is approximately 9” by 16” by 4” deep. We chose these dimensions so we could use the recycled cake box for a lid. Cut the freezer paper to fit inside the box. Cut in about four inches on both sides of each end so the paper will fold neatly into the box.

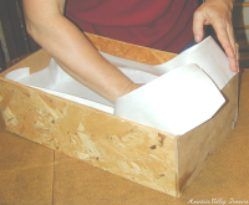
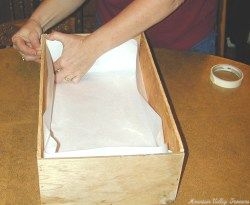
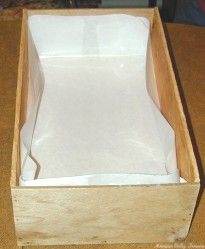
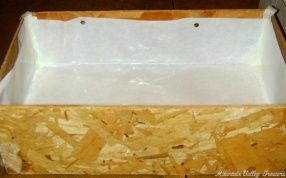
Place the paper smoothly into the box with the shiny side up. Secure the overlapping edges well, making sure there are no holes for liquid soap to escape through!
Taped and then thumb tacked, the mold is ready to go. Set it aside and proceed to Step Two.
Step Two: Dissolving and Melting
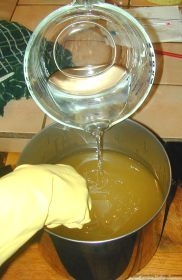
First a word about Lye. It is dangerous to you, your kids, your pets (be sure to put the cat out), and your furniture. If it gets on you it will burn and your skin will feel slippery. Flush with water until your skin no longer feels slippery. If you get lye in your eyes (which you won’t making this soap because you’ll have your goggles on!), then flush with water immediately and go to a hospital. If a little gets in your mouth, flush with water until you can’t taste it anymore. Always pour the lye into the water and never pour the water into the lye. Be sure to take into account the weight of the bowl when you use the scale. Measure 32 ounces of distilled water into the glass measuring pitcher.
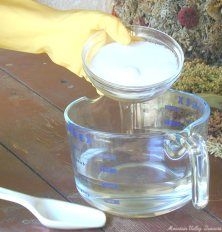
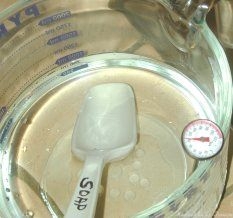
Put on goggles and rubber gloves and make sure all exposed skin is covered. Measure 12 ounces of Lye into the glass measuring bowl. ).
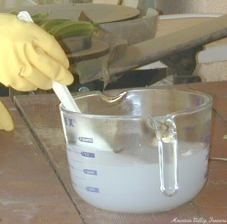
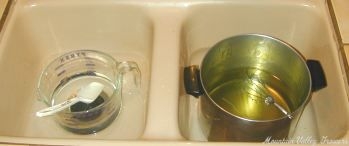
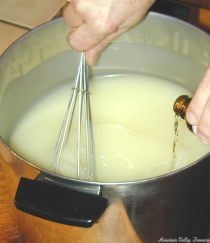
Take the lye, water and spoon outside or to a well ventilated area. Slowly pour the lye into the water, stirring quickly until dissolved (about 30 seconds It is now really hot! So let it sit here and cool while the fats are melting.
Now weigh out 38 ounces of vegetable shortening.
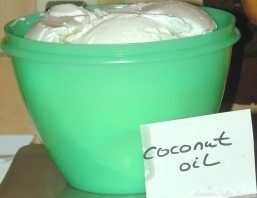
And then weigh out 24 ounces of Coconut Oil.
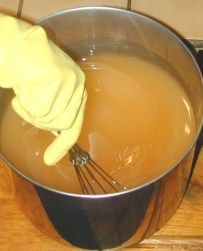
Add both of these fats to the Stainless Steel Stock Pot and put on a medium flame stir with a whisk until the big lumps are dissolved.
Take off the heat and let the smaller bits continue to dissolve.

Now, weigh out 24 ounces of Olive Oil.
And, with the coconut and vegetable oil mix off the stove, mix in the olive oil.
Step Two: Combining and Stirring
Remember how white the lye was when it was first mixed with the water? Now is has cooled to just under 100 degrees and looks more like water again.
It is important for the lye and the water to be close to the same temperature and that should be within the 90 to 100 degree range.
It may be necessary to put them in a cool water bath or a warm water bath to bring them to the right temperatures. Stir the mixture before reading the thermometer!
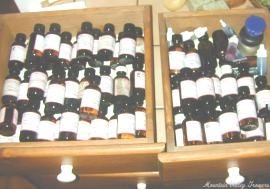
It is fun to have a lot of dried herbs and essential and fragrance oils to choose from. For this recipe, use Lavender Essential Oil and Dried Comfrey Powder.
While the lye and oils are coming to the right temperature, warm the essential oils in their own bath. The comfrey powder can be warmed in the microwave for just a few seconds.
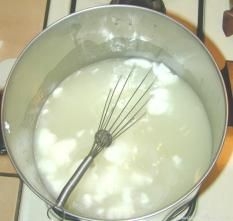
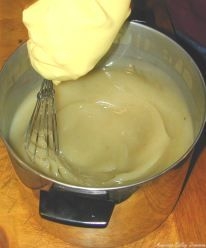
Once the lye and the oils are the same temperature, put Goggles and Gloves on, and slowly pour the lye water into the warm oils. Use the wire whisk and stir briskly in a circular motion without splashing.
Find a comfy spot to sit, because this needs to be stirred for 20 minutes. In the first few minutes of stirring, the mixture becomes thicker and changes to this pumpkin orange color. This reaction is known as saponification.
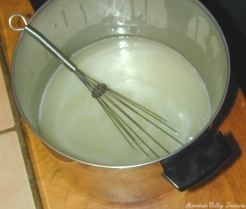
Near the end of the 20 minute period, the soap reaches what soap makers call trace. When the whisk is lifted the soap dribbles leave a slight impression on the surface.
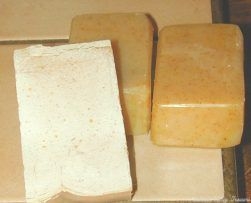
Slowly the mix changes from the raw orange, on the left, to the creamy white, above.
Stirring briskly, slowly add in 1 to 2 Ounces of Lavender Essential Oil.
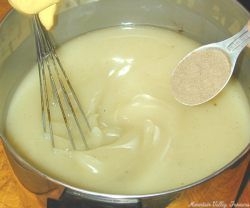
And 2 Tablespoons Comfrey Root Powder. This powder gives the soap a beautiful color when finished curing.
It is important to make sure these are completely incorporated into the mix. It takes about two minutes.
Step Four: Molding and Finishing
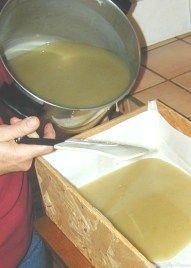
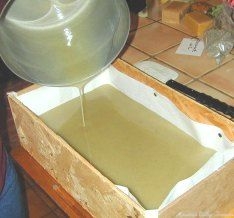
With gloves still on (shame on our instructor) pour the soap carefully into the mold. Use the spatula to scrape the last bits from the stock pot.
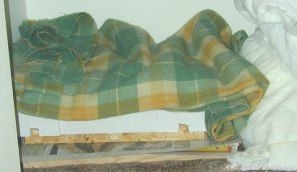
Now the soap needs to sit somewhere undisturbed for between 24 and 36 hours. These wool blankets keep the soap from getting too cold or warm.
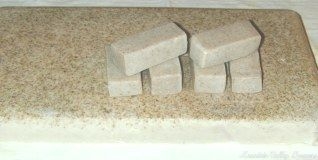
Since the soap made this day would not be ready to unmold for several days the next pictures are of a different batch. This was a pure Rosewood Soap.
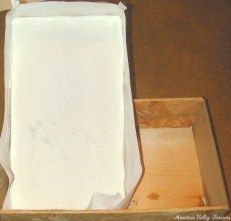
The soap is now molded but not yet cured. This means the lye is still able to cause problems. Wear gloves for all of the following procedures.
Lay a clean cloth where the soap can sit undisturbed for another 24 hours. Gently lift the soap from the mold and remove the freezer paper. The soap is still soft so be careful not to dent it.
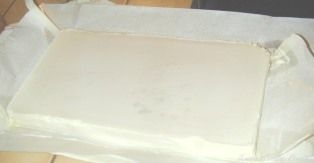
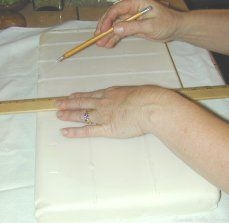
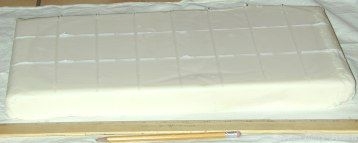
The next day, score the slab into whatever size bars are preferred. These are 3 by 2 bars.
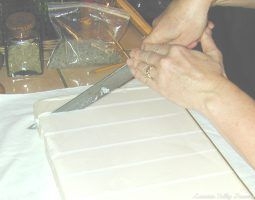
A sharp kitchen knife is used to cut them apart.
{’ ‘}
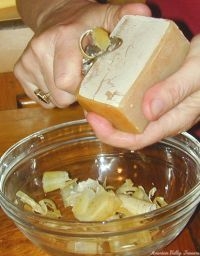
The last finishing touch is shaving the soap. It is not uncommon for soap to form a thin layer of ash on the surface.
This can be left or it can be removed to make a smoother, more attractive bar. A Vegetable Peeler works well for this. These shavings can be saved and used for making French milled soaps (but that is another story!).
Store the bars out of light and heat for another 2 to 3 weeks. Once they are cured they are ready for using.
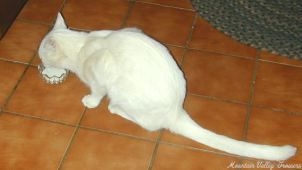
Now that the soap is finished, don’t forget to let the cat back in!
Many thanks to Connie Nerison of Squaw Valley Soap Works for sharing her knowledge with us. Connie has been making soaps and other high quality cosmetic products for over two decades.